RARE! WWII WWII British 1st British Airborne Division Operation Market Garden British Horsa Glider Fragment - Arnhem


RARE! WWII WWII British 1st British Airborne Division Operation Market Garden British Horsa Glider Fragment - Arnhem
Comes with hand-signed C.O.A.
In the summer of 1944, the Allies launched a daring airborne operation to secure the River Rhine crossings and advance into northern Germany. Although it ultimately failed to achieve its objectives, the determination and courage shown by the American and British airborne, glider regiment troops, and the units that assisted them made Operation Market Garden one of WWII’s most famous battles.
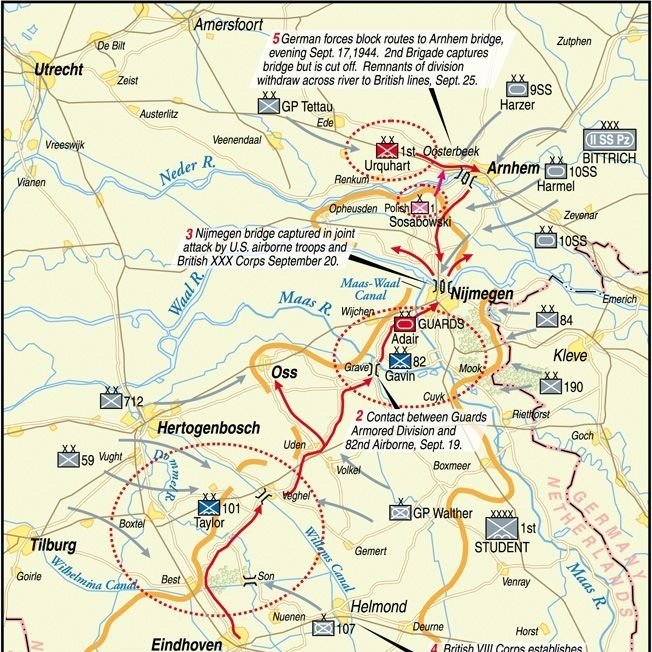
Operation Market Garden was an Allied military operation during the Second World War fought in the Netherlands from 17 to 27 September 1944. Its objective was to create a 64 mi (103 km) salient into German territory with a bridgehead over the River Rhine, creating an Allied invasion route into northern Germany. This was to be achieved by two sub-operations: Seizing nine bridges with combined U.S. and British airborne forces (Market) followed by land forces swiftly following over the bridges (Garden).
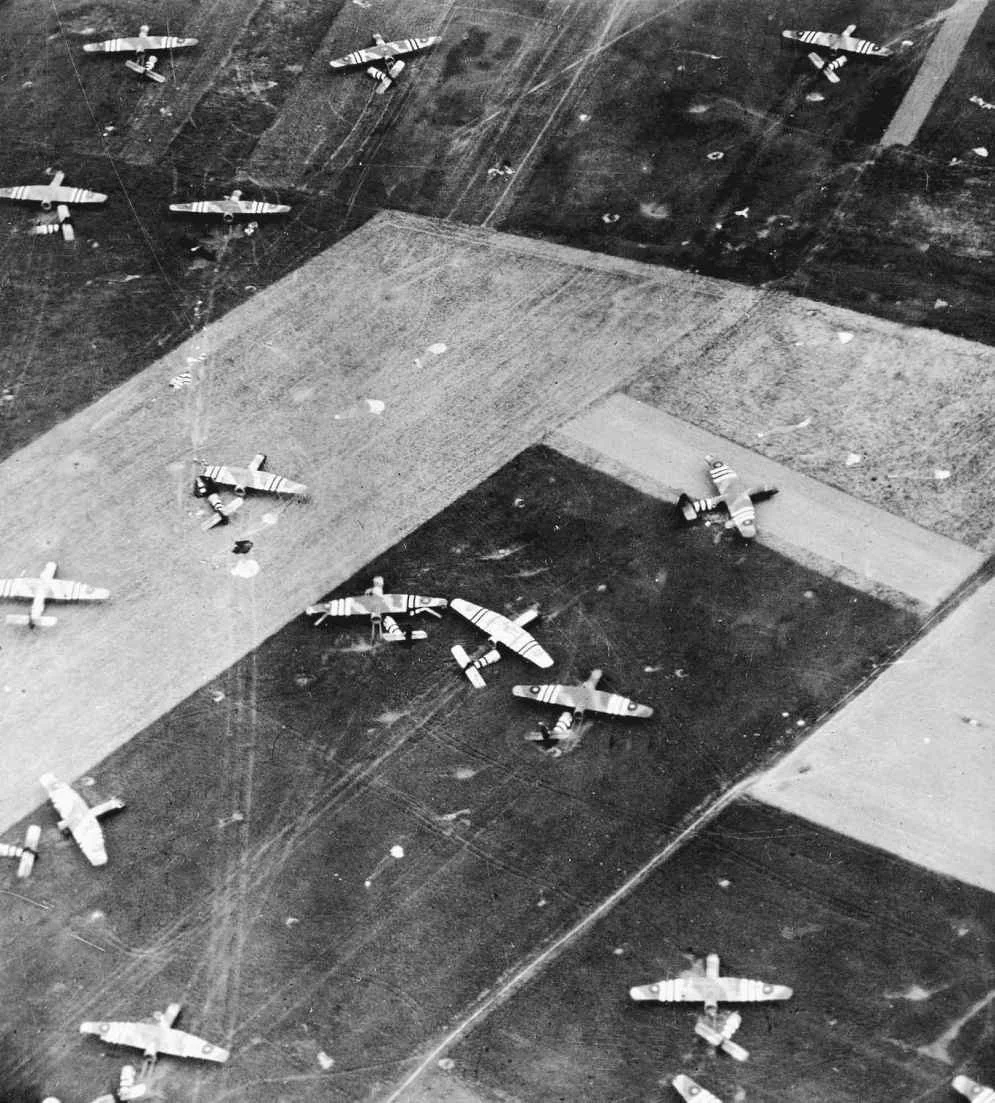
Operation Market Garden is famous for being the largest airborne operation in history, delivering over 34,600 men of the 101st, 82nd and 1st Airborne Divisions and the Polish Brigade. 14,589 troops were landed by glider and 20,011 by parachute. Gliders also brought in 1,736 vehicles and 263 artillery pieces.
Just after 10.00 hours on Sunday, September 17th, 1944 British Horsa glider and tug combinations took off from RAF Keevil for Arnhem as part of Operation Market Garden. Of the one hundred and fifty-three gliders that left England for this zone (Arnhem), all but nineteen arrived.
This incredible and rare WWII British 1st British Airborne Division British Horsa glider relic was recovered from Arnhem battlefield of Operation Market Garden. This Horsa glider was recovered during a professional excavation of the battlefield and is one of the glider that carried the 1st British Airborne Division to their Arnhem landing zone.
Codenamed 'Market Garden', this plan involved the seizure of key bridges in the Netherlands by the 101st and 82nd US Airborne Divisions, and 1st British Airborne Division who would land by parachute and glider.
On September 17th, 1944 the 1st Airborne Division, commanded by General Roy Urquhart, were landing on the drop zones and landing zones just west of Arnhem. Just before the landings took place, the RAF flew several bombing missions, blasting targets that would make the process of reaching the bridge easier for the airborne troops. German barracks, Anti-Aircraft (AA) guns, bunkers and ammo dumps were some targets that were on the hitlist for the 2nd Tactical Air Force. Thirty minutes before the drop of the main force, the 21st Independent Parachute Company was dropped. They acted as pathfinders for the main force, marking the drop- and landing zones. At 12.30 hours these men jumped over Wolfheze.
The main force consisted of the 1st Parachute Brigade (Brigadier Gerald Lathbury), the 1st Airborne Recce Squadron (Major Charles Gough), the 1st Airlanding Brigade (Brigadier Philip Hicks) and the 1st Airborne Division’s commander Urquhart and his staff. The paratrooper elements were to jump over Drop zone X (see map). The 1st Airlanding Brigade landed at Landing zone S (see map) with 350 gliders and had the important task of defending the drop- and landing zones for the next airlift. More forces were to arrive in the upcoming days. In total just over 10000 paratroopers and glidermen were to be delivered on the drop- and landing zones. Other glider elements, engineers, signal corps, divisional headquarters, artillery units, medical troops, were to land on Landing zone Z. Supplies for the division were supposed to be delivered on Landing zone L. The landings for the 1st Airborne Division went very well and hardly any resistance was encountered. Quickly the men assembled and dispersed to their initial objectives; the railroad and road bridge over the Rhine at Arnhem.
It didn’t take long until the Germans took countermeasures. The German forces in and around Arnhem were completely surprised by the Airborne landings. Generalfeld-Marschall Walter Model, commander of Heeresgruppe B, evacuated his headquarters and left for Doetinchem. He ordered General Friedrich Kussin, Feldcommandant of Arnhem, to inform Hitler’s headquarters of the Airborne Landings. Arriving at Doetinchem, Model ordered Obergruppenführer Wilhelm Bittrich, commander of the 2nd SS Panzer Corps, to close down Arnhem. Bittrich already anticipated on the attacks and as soon as he heard of the airborne landings he had sent Oberführer Walter Harzer of the 9th SS Panzer Division ‘Hohenstaufen’, towards Arnhem to close down the main roads leading into the city. He also ordered Hauptsturmführer Victor Gräbner to take a small group of the 9th SS Panzer Division to the road bridge at Nijmegen. The 10th SS Panzer Division ‘Frundsberg’ was also sent to Nijmegen to close down the city.
Recce Squadron’s target, led by Major Gough, was the Arnhem bridge. He was ordered to follow a path alongside the railroad tracks leading into Arnhem but he was stopped by Sturmbahnnführer Kraft’s training battalion at the Wolfhezerweg. The 1st Parachute Brigade continued their advance towards Arnhem, each battalion used a different route called: Tiger, Lion and Leopard.
1st Battalion, commanded by Lt-Col. David Dobie, followed the Amsterdamseweg (Leopard route). They soon bumped into troops of the 9th SS Panzer Division and suffered severe losses. They would not be able to reach the Arnhem bridge and their only option was to dig in and fight the German troops.
2nd Battalion, commanded by Lt-Col John Frost, followed the road next to the river (Lion route) to reach Arnhem. They had minor delays in Oosterbeek when they were welcomed by Dutch citizens, already celebrating their liberation. Because of this delay they didn’t reach the railroad bridge in time, the Germans already blew it up just before Frost’s troops arrived. Frost kept moving forward. He was ordered to hold the south and the north side of the road bridge. Sadly the second objective, the pontoon bridge over the Rhine, was partially down so Frost’s troops weren’t able to cross the river to the southern side of the river. Frost kept advancing and arrived at the Arnhem road bridge at 19.30 hours. He made an effort crossing the bridge, but the Germans had already set up defenses on the southern side of the bridge. A second attempt was made at 22.00 hours but with no effect. The Germans surrounded Frost’s troops by taking Arnhem. Now 600 men of Frost’s battalion were cut off from the rest of the airborne troops.
3rd Battalion, commanded by Lt-Col John Fitch, followed the Utrechtseweg (Tiger route). Soon after they left the drop zones, the bumped into a German staff car. The paratroopers opened fire, thereby killing General Kussin, his driver, guard and interpreter. Further up on the Utrechtseweg they were stopped by Kraft’s troops at Hotel de Bilderberg. After intense fighting the battalion reached Hotel Hartenstein in Oosterbeek where they set up HQ for the division.
The day didn’t go too well for the 1st Airborne Division. The different outfits weren’t able to achieve their goals due to failure in their communication. Also, the presence of the 9th and 10th SS Panzer wasn’t anticipated. Airborne units aren’t well equipped to fight against tanks, therefore it was fairly easy for the German forces to stop the airborne advance on Arnhem and keep a hold of the city.