RARE! WWII 1945 B-29 Navigator XXI Bomber Command NAKAJIMA (NAKAJIMA AIRCRAFT PLANT) JAPAN Target Air Raid Mission Target Photo Map*


RARE! WWII 1945 B-29 Navigator XXI Bomber Command NAKAJIMA (NAKAJIMA AIRCRAFT PLANT) JAPAN Target Air Raid Mission Target Photo Map*
Comes with hand-signed C.O.A.
These XXI Bomber Command target photo maps rarely come up for sale in the public sector. This is a once in a timeline chance to own a piece of B-29 WWII history.
This incredibly scare and museum-grade ‘RESTRICTED’ WWII XXI Bomber Command (20th Air Force) TARGET AERIAL PHOTO MAP CHART was used during the USAAF long-range bombardment operations, against Japan until mid-July 1945. The XXI Bomber Command was headquartered at Harmon Field, Guam, in the Mariana Islands.
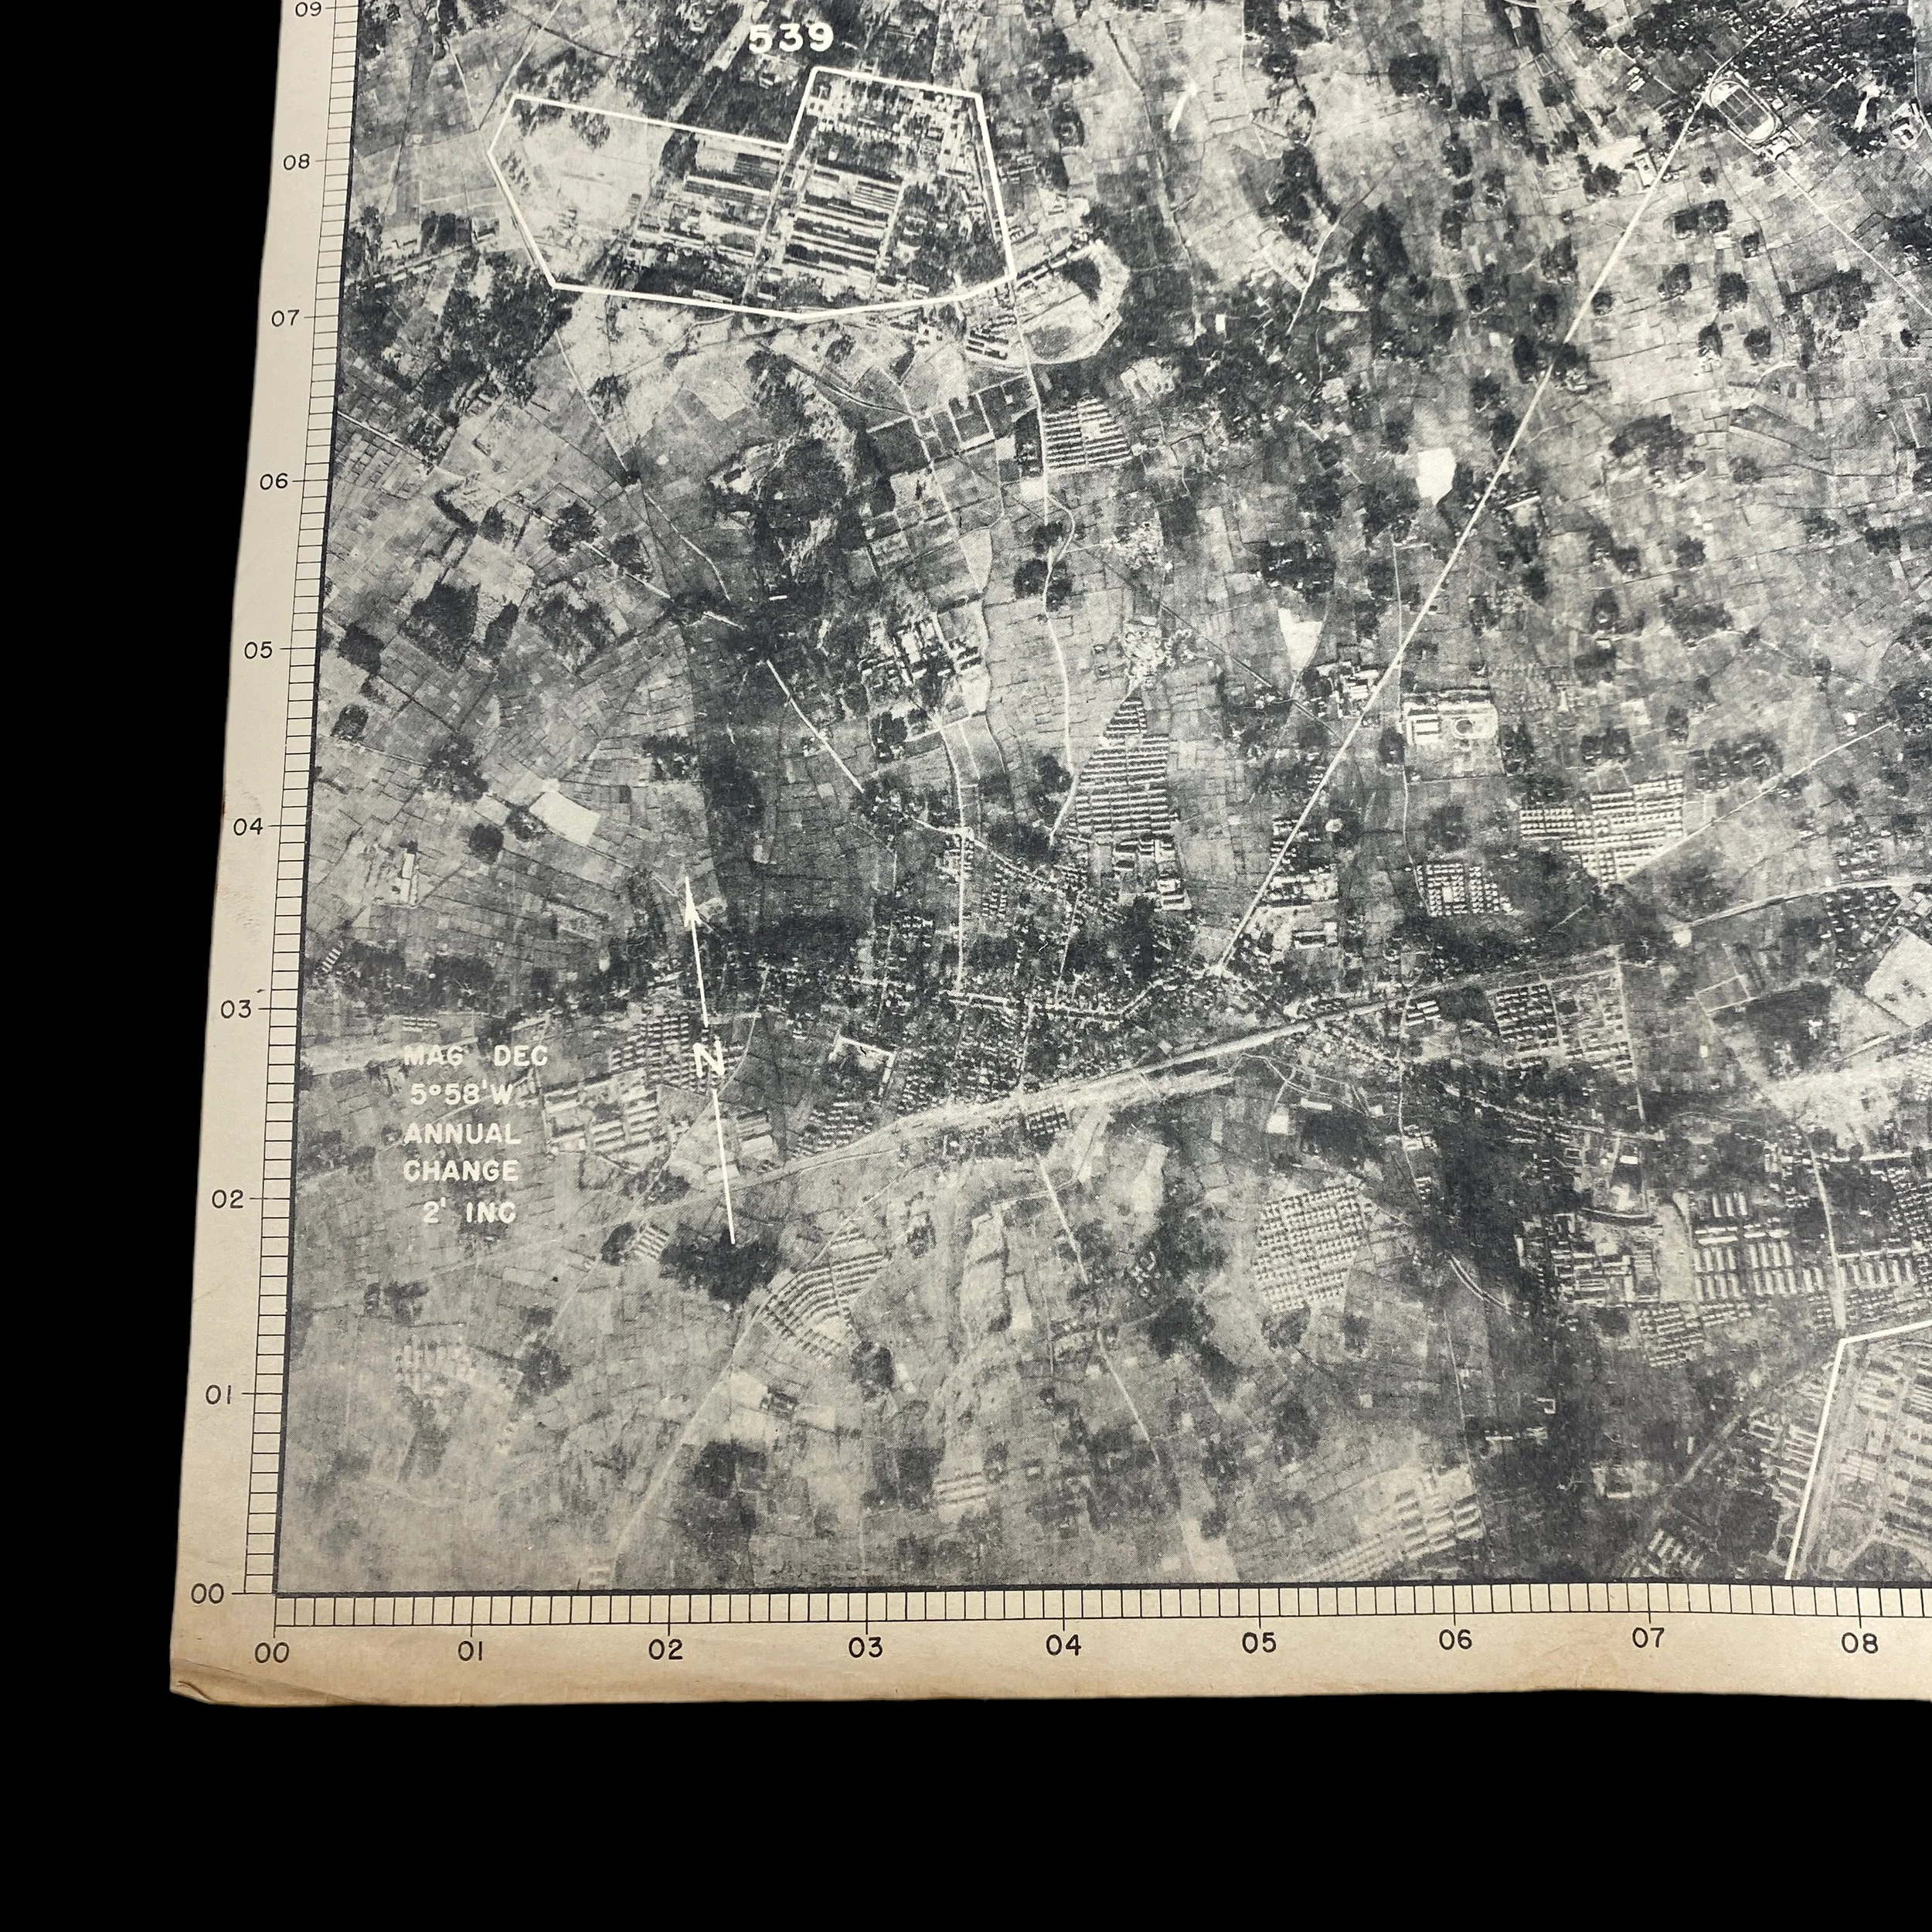
Dated JUNE 1945 and titled “NAKAJIMA AIRCRAFT PLANT - TANASHI FOUNDRY”, this A-2 SECTION was produced in limited quantities with previous aerial reconnaissance mission photos by the 3rd Photo Reconnaissance Squadron taken on December 28th, 1945.
This navigators and bombardier aerial photo chart map was specifically creating using the most updated military intelligence in order to give B-29 Superfortress aircraft the most accurate target information. This was done for fast and effective target identification as well as accurate navigation and bomb/incendiary accuracy. These target photo charts were handed to B-29 crews during the target mission briefing and were then carried on the B-29 aircraft to used during the raid itself.
These aerial photo charts were referenced during pre-mission briefings as well as when the bombardier was approaching the target. This was meant to provide the B-29 bombardier with the most real view of his target for the best target identification. The most important primary target buildings were always outlined and marked with a number to be referenced on the target key.
Still interested in the possibilities of night tactics, LeMay's operations officers realized that some more effective way of lighting the target would have to be devised. Because there was no agreement at the wing level as to the best procedure, LeMay decided to let O'Donnell and Storrie run single-wing missions, each trying his own technique. Storrie's attack on 30 March, obviously on an experimental scale, involved only 14 of the 314th Wing's planes--3 loaded with flares, 7 with 5 tons each of 500-pound GP's, and the last 4 with a mixed cargo of bombs and flares. In spite of the large ratio of flares carried, the twelve planes that got over Nagoya missed the Mitsubishi plant entirely.6 The 73d's effort was larger but hardly more successful. On 1 April, O'Donnell sent against Nakajima-Musashi 121 B-29's, each topping off its bomb load with 4 flares. Of 1,019 tons dropped, only 4 hit in the area.
Since none of the attempts had provided any positive evidence, LeMay ordered for the night of 3 April three one-wing attacks against Mitsubishi's Shizuoka engine plant, Nakajima's Koizumi assembly plant, and the Tachikawa aircraft engine plant. Command headquarters specified the mean point of impact, bombing altitude, and bomb load; each wing was allowed to choose its own method of lighting the target. Again, the results in each instance were negligible.8 The command just wasn't equipped for night precision bombing; specifically, it needed target marker bombs, such as the 1,000-pounders used by the RAF, and reflex optic bombsights. Lacking the proper equipment, LeMay abandoned the experiment. For a while B-29's were kept busy enough with airfield strikes in support of the battle for Okinawa,* but between trips to Kyushu they were sent occasionally against the aircraft industry in daylight missions.
The 73d Wing hit pay dirt, too. It had been banging away at Nakajima-Musashi since the first Tokyo raid without much effect. Weather had made the target hard to hit, and the 500-pound GP's used had been too light for the plant's modern buildings of steel and reinforced concrete. On the 7th, however, Tokyo's weather was as near perfect as Nagoya's and the 101 planes that bombed were loaded with newly arrived 2,000-pounders. About 26 per cent of the 490 tons dropped hit in the target area, doing heavy damage in the machine shops and destroying about 10 per cent of the plant's buildings. The same wing returned to Musashi on 12 April to finish up the job with 119 planes again loaded with 1-ton bombs. The aiming point was in the Tama section, untouched on the 7th. Because of a heavy haze, bombardiers had to make a radar run; they missed Tama but got sixty-four tons into the eastern section of the plant, causing heavy structural damage to 10 per cent of Musashi's buildings. Eleven B-29's, unable to bomb the primary, hit Mitsubishi's Shizuoka engine works, a new plant just coming into production, and damaged approximately 86 per cent of the roof area.
These raids about finished Musashi. The command was to make an abortive attempt against it in June and to return on 8 August when lucrative targets were scarce, but both missions were superfluous. By 12 April the B-29's had staged eleven missions against this, the No. 1 target: four had failed entirely because of weather, and of the seven in which bombs were dropped, only the last two were more than moderately successful. It must have been somewhat embarrassing to the command that Task Force 58's low-level strike on 17 February had done more damage than any single VHB attack, but it was the cumulative effect of repeated blows that ruined the plant. Nakajima officials had long since abandoned any efforts at repair, concentrating on removing machine tools and equipment to dispersal areas. Production had fallen to 425 engines in March and now, after the April attacks, ceased entirely.
The weather had held up somewhat better than had been expected, allowing five daylight missions in April, three in May, four in June. Thereafter almost a month passed before visual conditions again obtained. On 24 July the command put up 625 planes, directed against 7 targets in the Nagoya and Osaka areas. The attacks were coordinated with a two-day carrier strike in the Inland Sea region. Targets for the B-29's were chosen to give the several formations a wide choice according to local conditions, but in each case the force assigned was considered heavy enough to destroy its primary target.35 Weather turned out spotty; 26 aircraft dropped 166 tons on targets of opportunity and 573 dropped 3,539 tons on primary visual or radar targets.36 The Sumitoma Metal Company's propeller factory, whence most of the machine tools had been removed, was completely wrecked.37 Kawanishi's Takarazuka plant lost most of its buildings and no effort was made subsequently to repair them.38 The Osaka arsenal, though cloud-covered and attacked by only part of the assigned force, suffered additional damage amounting to 10 per cent of the original roof area.39 Aichi at Eitoku sustained its heaviest damage of the war, damage which was superfluous because of previous dispersal.40 Nakajima at Handa, struck for the first time, lost its principal assembly buildings, but the attack came too late in the war to have much direct effect on production