"HEAVILY MARKED" WWI "Le Chamois Farm" Artillery/Trench Mortar Battery A.E.F. Firing Squad Battlefield Trench Map*


"HEAVILY MARKED" WWI "Le Chamois Farm" Artillery/Trench Mortar Battery A.E.F. Firing Squad Battlefield Trench Map*
Comes with a hand-signed C.O.A.
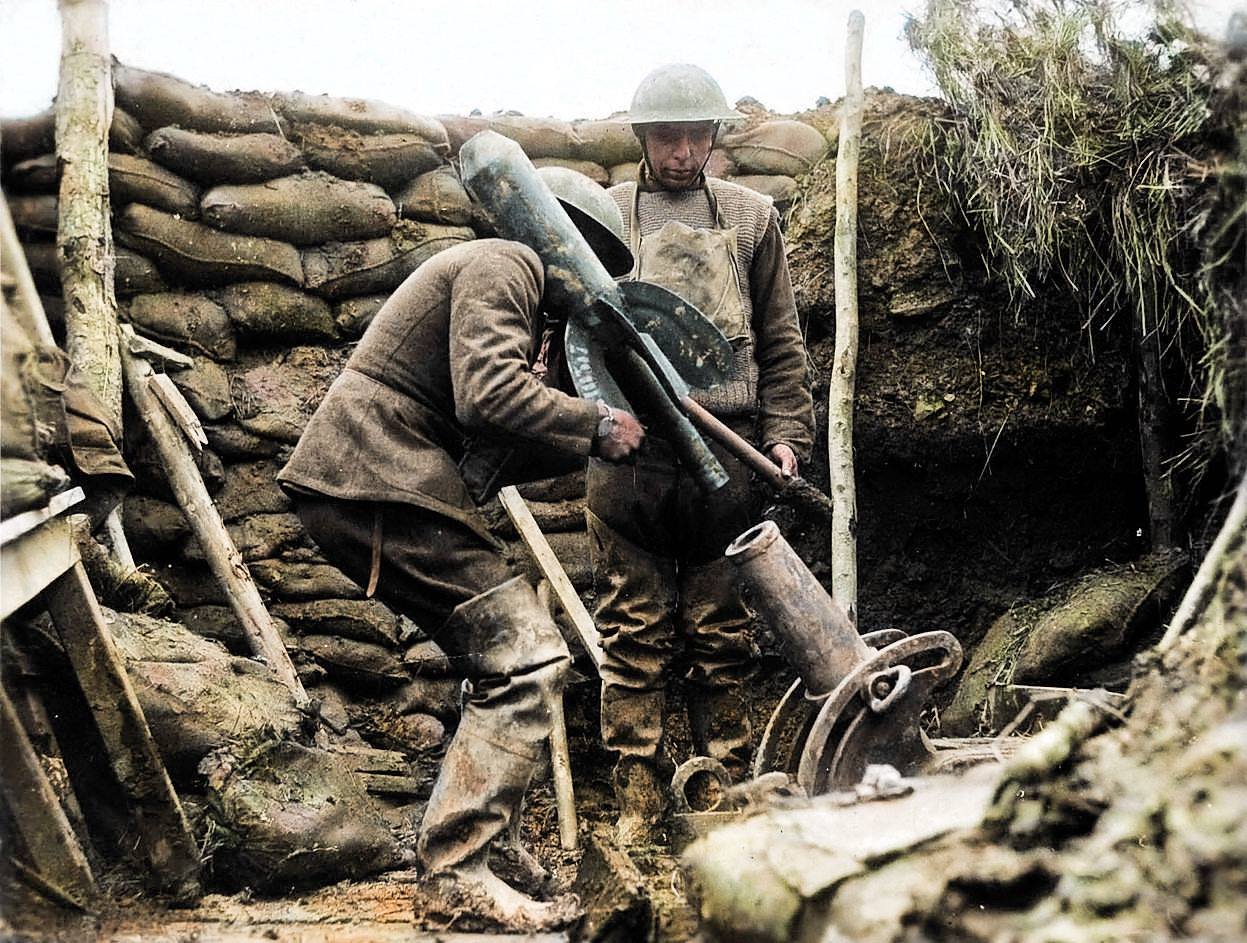
The battle region this map shows is historically documented with a famous photo of US soldiers, members of Maryland's 117th Trench Mortar Battery, 67th Artillery Brigade, 42nd. Division operating a 58mm French trench mortar. This crew kept up a continuous fire throughout the raid of March the 4th 1918 in Badonviller, Muerthe et Modselle, France. Mortars remained key weapons in trench warfare because of their ability to deliver indirect fire. The spot toward which the raid was directed was a little group of ruined brick buildings just north of Badonviller, known as Le Chamois Farm. The 168th Infantry was holding it. It was right at the junction of two valleys, an ideal place to sneak upon, but a death trap if properly defended.
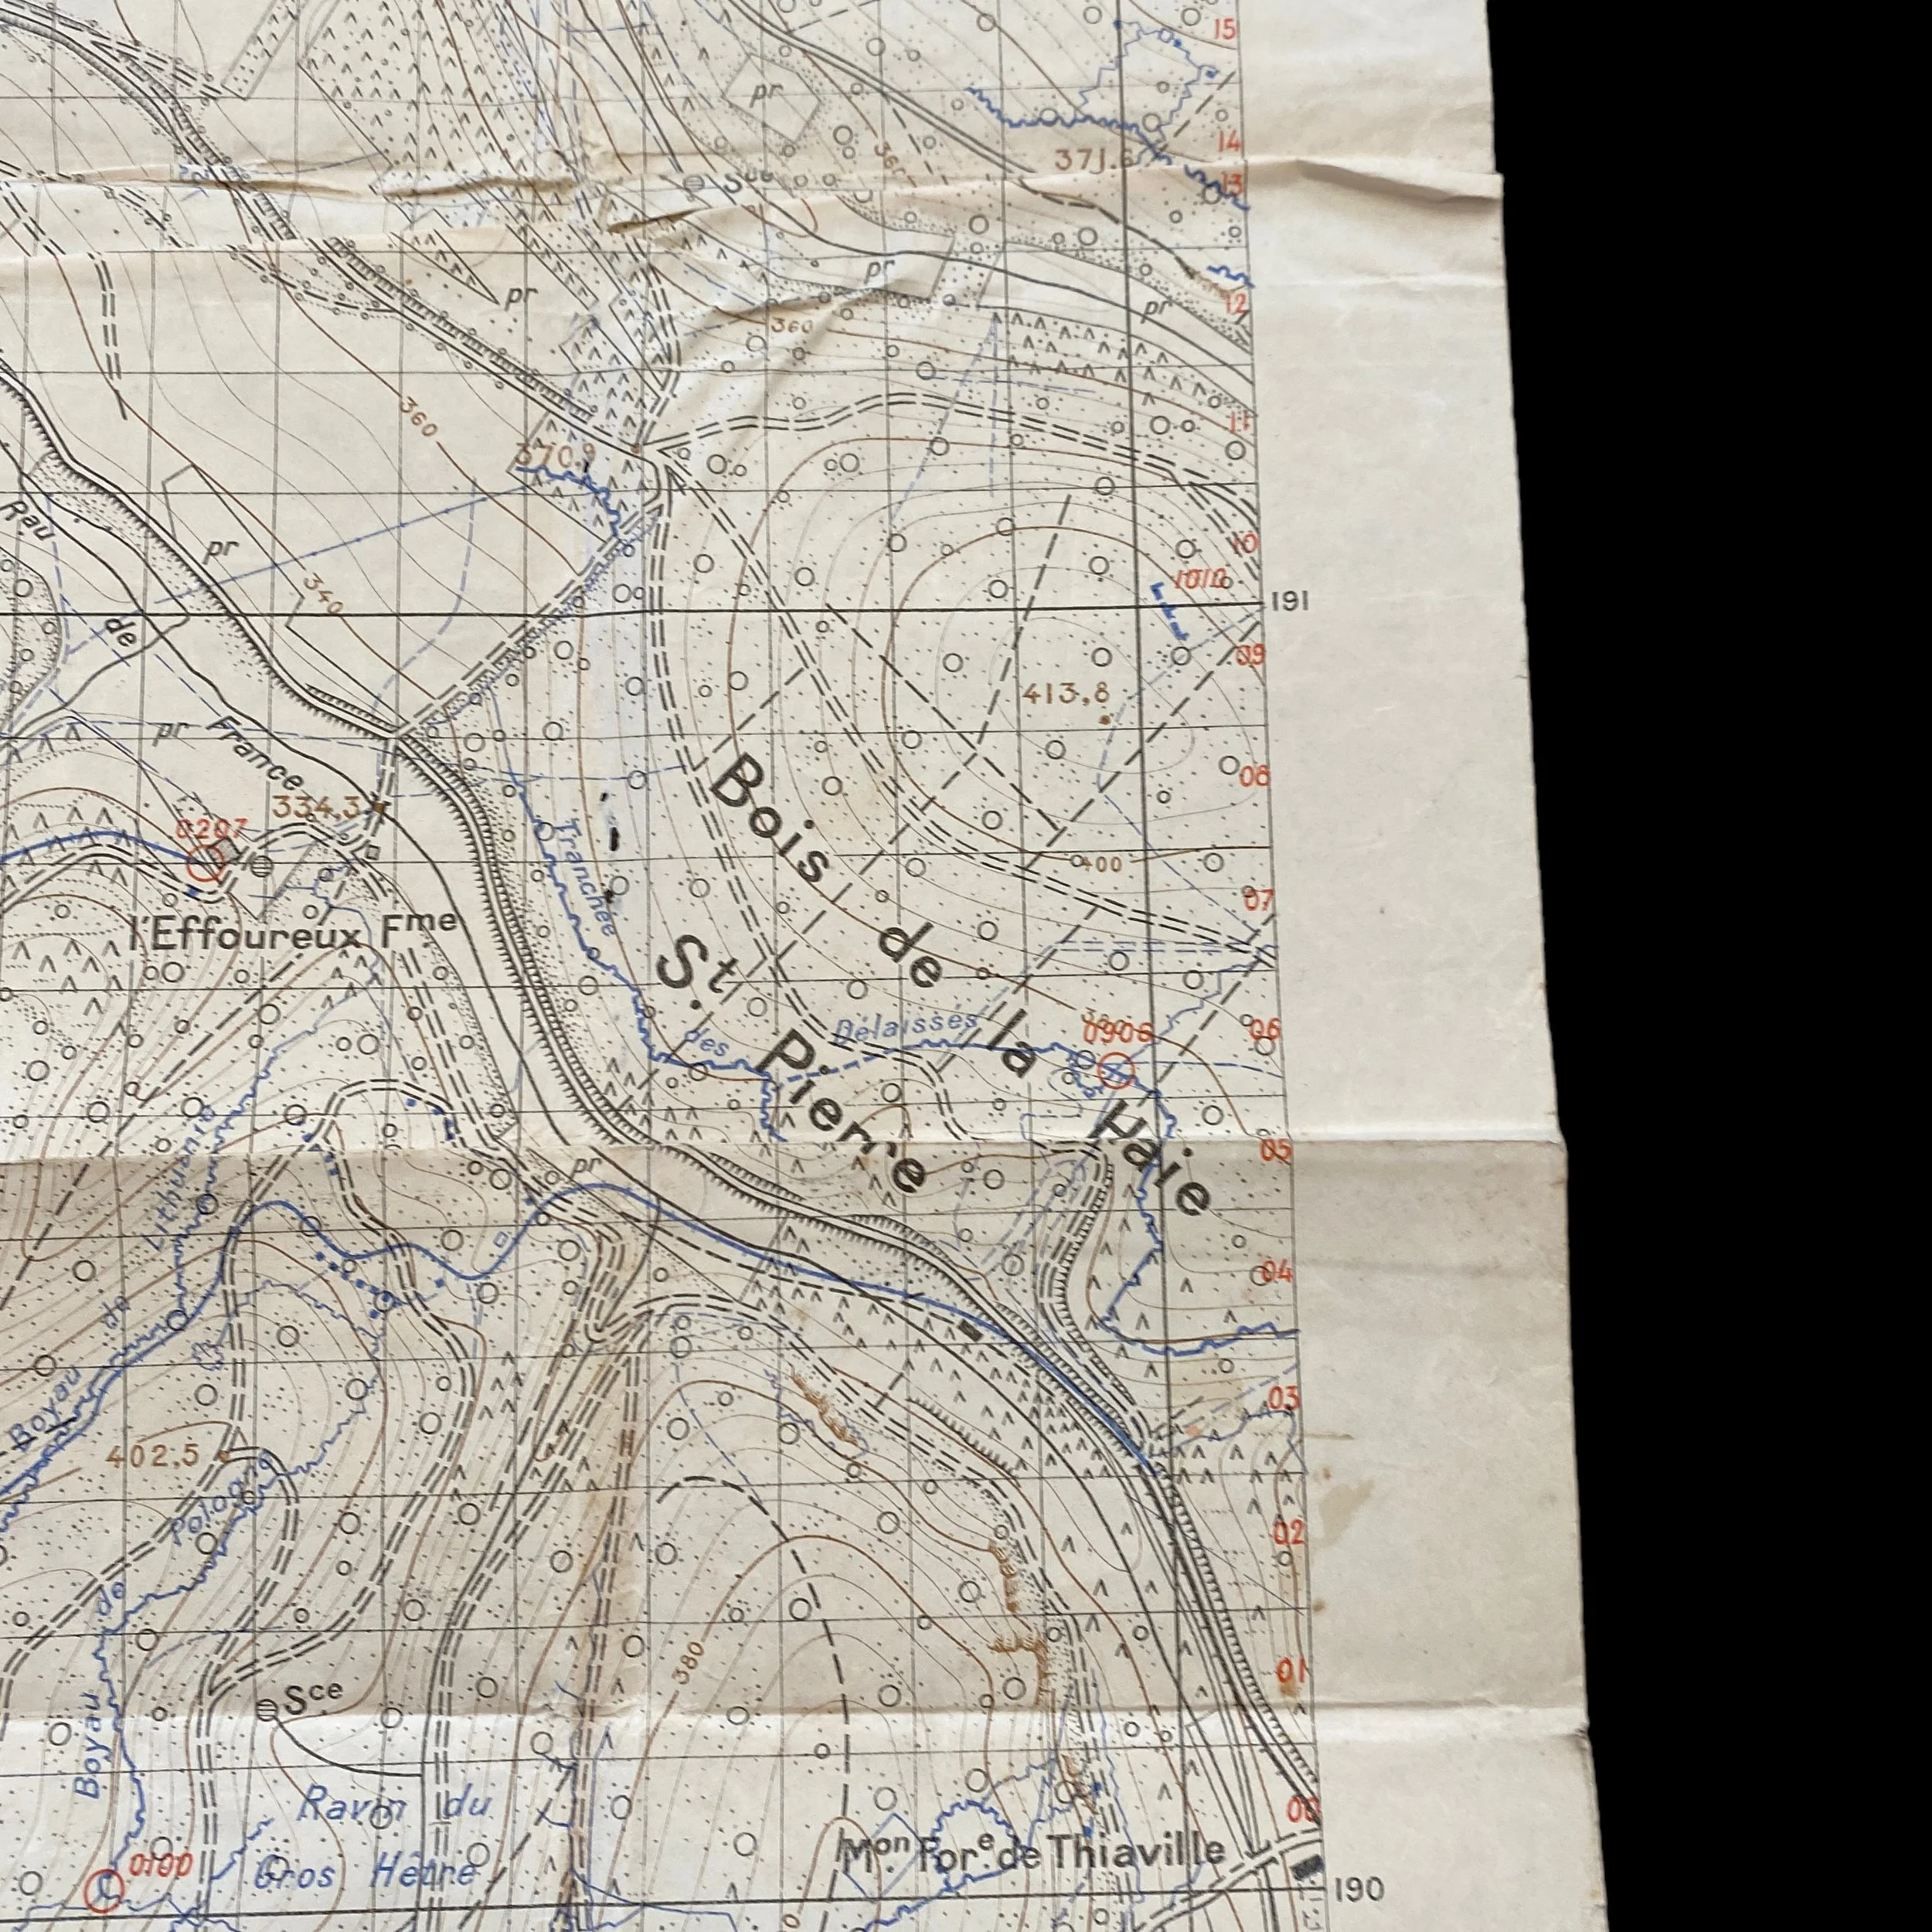
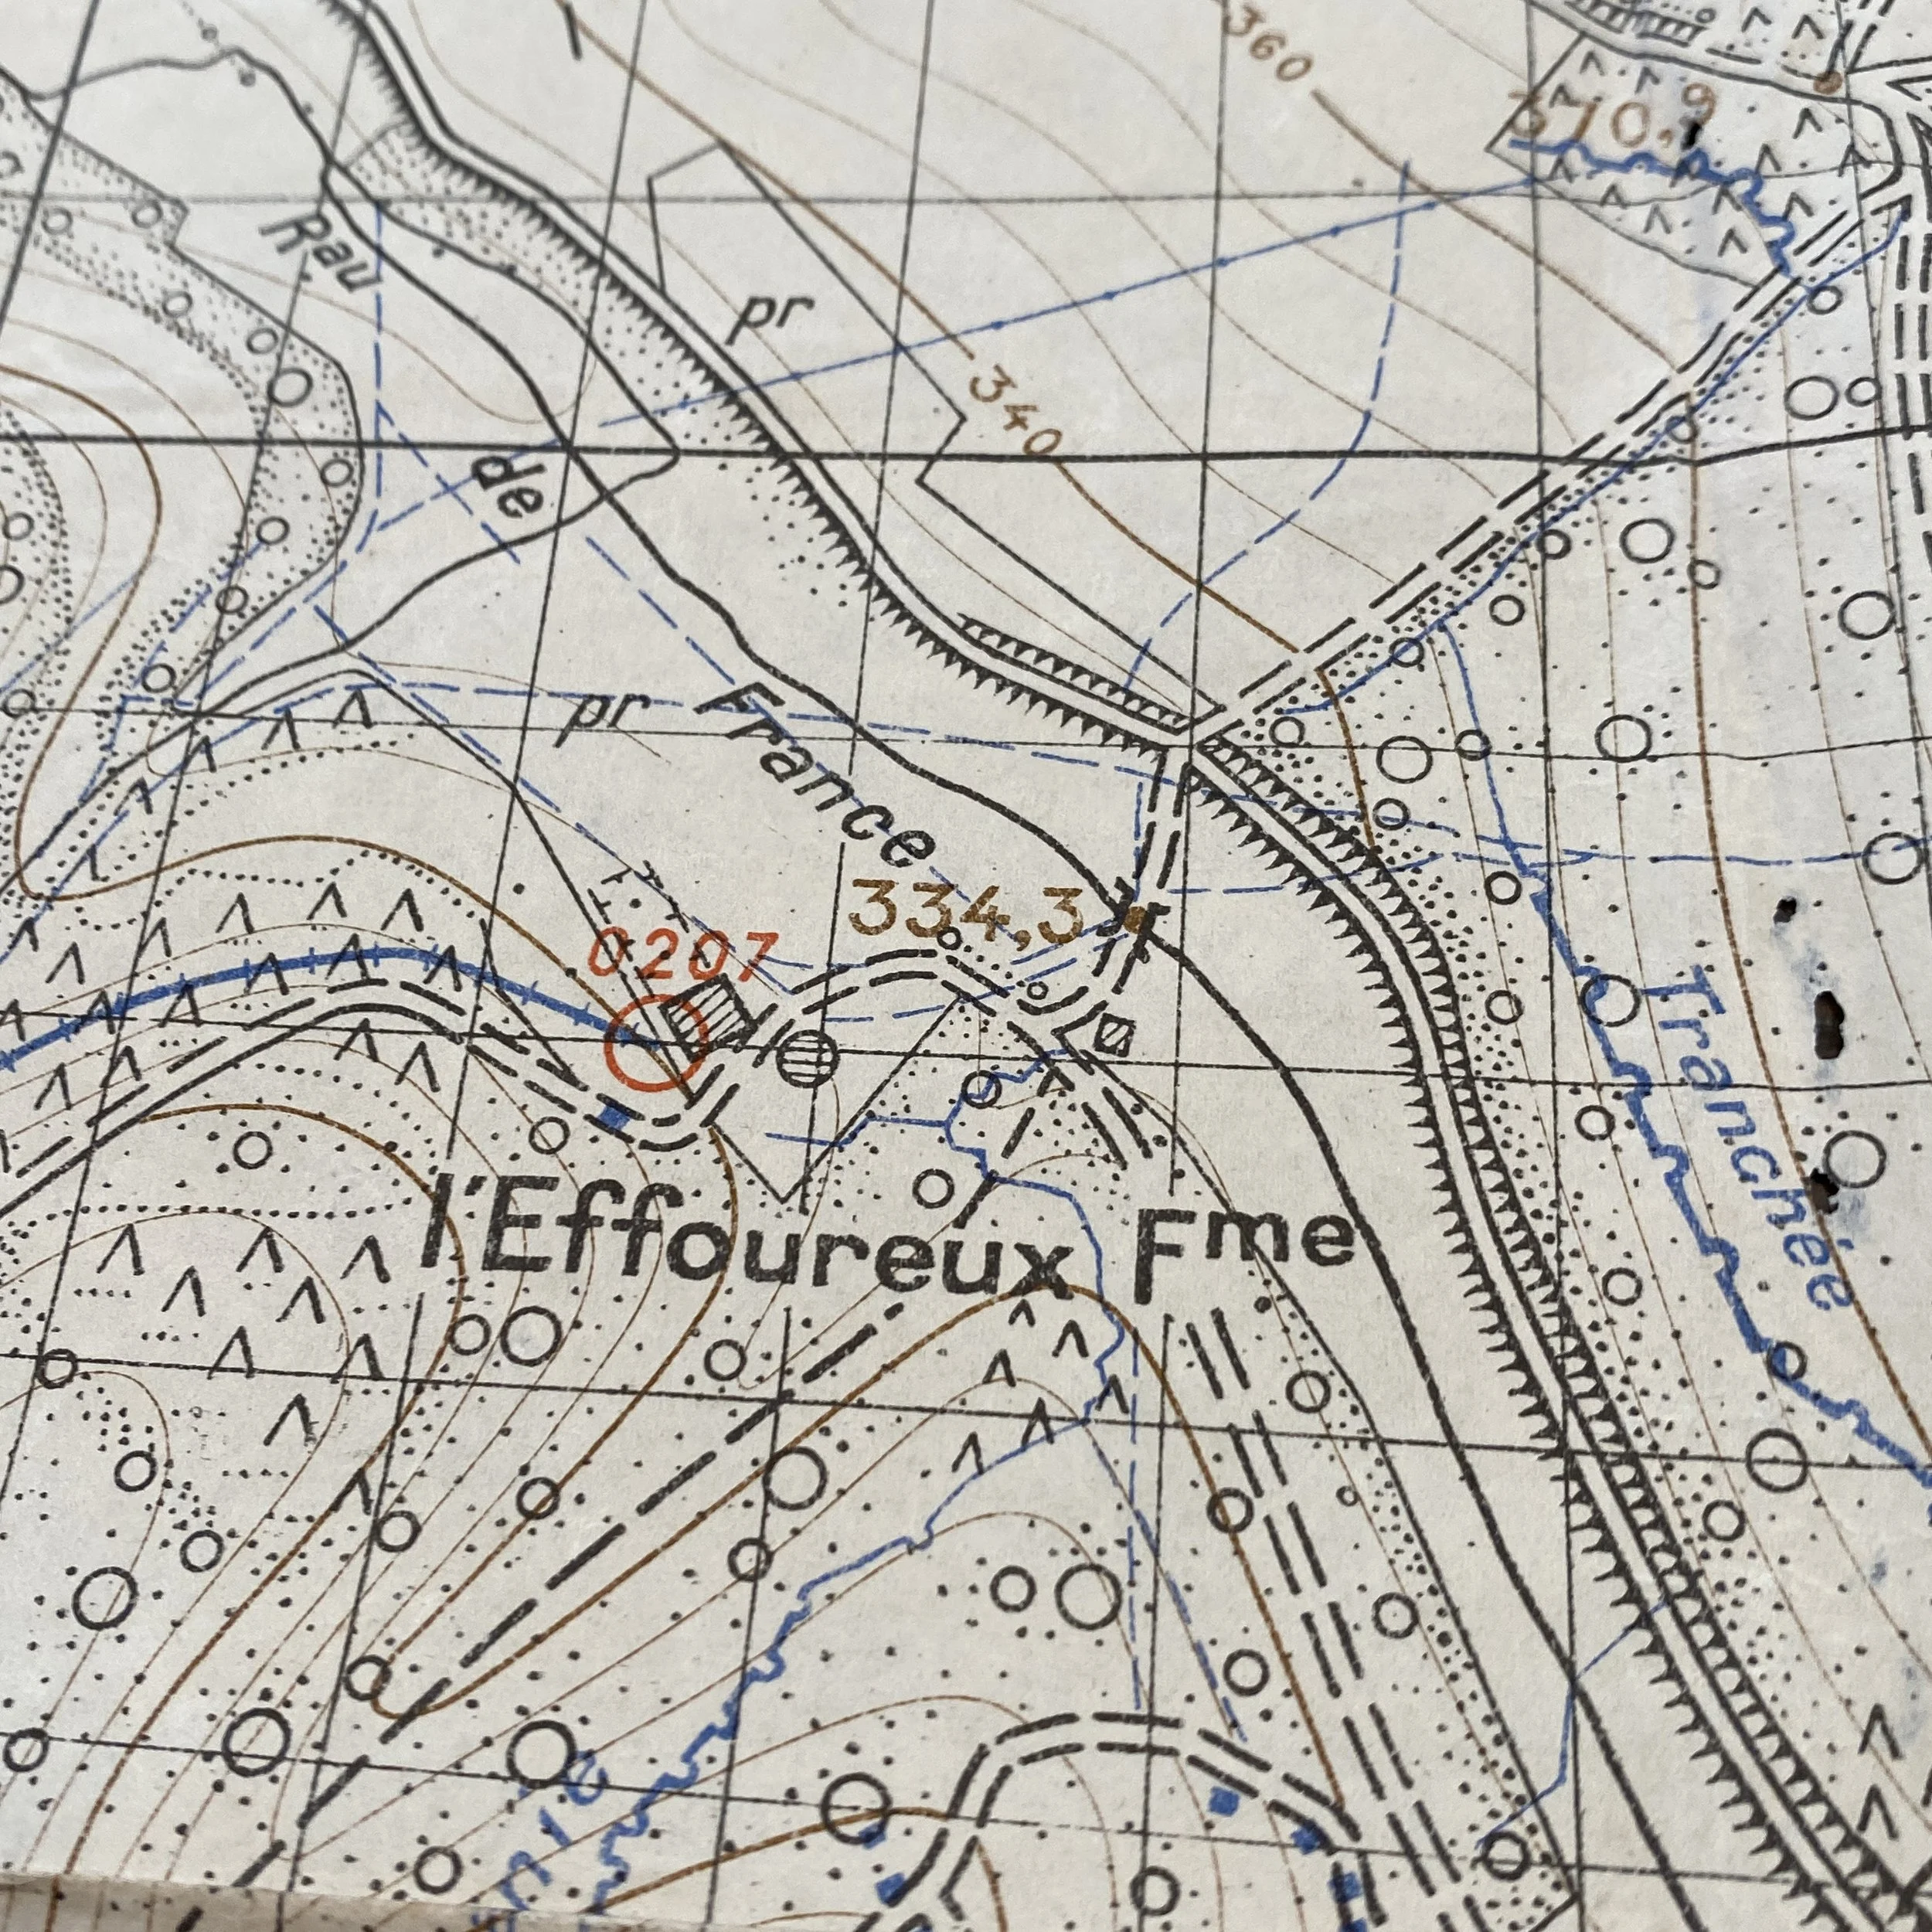
This map is heavily marked with artillery and mortar firing lines in the Le Chamois area directed at German trenches.
During World War I, trench maps were an essential tool for soldiers on both sides of the conflict. These maps provided detailed information about the terrain, including the location of trenches, barbed wire, and other obstacles. They also showed the location of enemy positions, allowing soldiers to plan their attacks and defenses more effectively. One of the most significant battles of the war, the battle near Le Chamois, provides an excellent example of how trench maps were used during the conflict.
The battle near Le Chamois took place in the summer of 1918, during the final year of the war. The Allied forces, including the American Expeditionary Force (AEF), were attempting to break through the German lines and advance towards the city of Metz. The Germans, however, were well-prepared and had heavily fortified their positions with trenches, and artillery.
To prepare for the attack, the AEF soldiers used trench maps to study the terrain and plan their strategy. These maps were incredibly detailed, showing the location of every trench, MG nest, and artillery position. They also showed the contours of the land, allowing soldiers to plan their movements and avoid obstacles.
Once the attack began, the AEF soldiers used the trench maps to guide their artillery and mortar fire. By accurately targeting German positions, they were able to suppress enemy fire and create gaps in the German lines. This allowed the infantry to advance and capture key positions, including the farm of Le Chamois.
The use of trench maps was critical to the success of the AEF during the battle near Le Chamois. Without these maps, it would have been nearly impossible to accurately target German positions and plan the attack. The maps allowed soldiers to understand the terrain and the enemy's defenses, giving them a significant advantage in battle.
The use of trench maps was a crucial part of the strategy during World War I. They allowed soldiers to plan their attacks and defenses more effectively, and they were essential for accurate artillery and mortar fire. The battle near Le Chamois provides an excellent example of how these maps were used during the conflict, and it highlights their importance in the war effort.
Trench maps were not only essential for planning attacks and defenses but also for navigation. The trenches were often confusing and complex, with many twists and turns. Soldiers could easily get lost or disoriented, especially during nighttime operations. Trench maps provided soldiers with a clear understanding of the layout of the trenches, allowing them to navigate more effectively and avoid getting lost.
In addition to their use on the battlefield, trench maps were also used for intelligence gathering. Soldiers would often go on reconnaissance missions to gather information about enemy positions and defenses. They would use trench maps to record their observations and report back to their commanders. This information was then used to update the maps and plan future operations.
The battle near Le Chamois was a significant turning point in the war. The AEF's success in breaking through the German lines and capturing key positions paved the way for the final Allied victory. The use of trench maps played a crucial role in this success, allowing soldiers to accurately target enemy positions and plan their movements.
It's worth noting that trench maps were not foolproof. They were often outdated or inaccurate, and the terrain could change rapidly due to artillery fire or weather conditions. Soldiers had to be flexible and adaptable, using their training and experience to adjust their plans on the fly.
Overall, the use of trench maps was a critical part of the war effort during WWI. They provided soldiers with essential information about the terrain and enemy positions, allowing them to plan their attacks and defenses more effectively. The battle near Le Chamois is just one example of how these maps were used during the conflict, and it highlights their importance in the final Allied victory.